Finding the Unity download link
This article explains how to set up a Unity project hosted on GitHub with Travis CI so that Travis can run unit tests as well as make builds and upload them to a dedicated server. An example repository with all the steps completed can be found here.
This tutorial assumes some proficiency with Bash scripting and Travis configuration. This approach offers the ability to customize your build configuration (for example, if your project is a web app, you can conceivably deploy it automatically), but if you'd like a simple setup through a web interface it's worth checking out Unity Cloud Build. It offers the ability to run tests as well as make and share builds; it's recommended that you start out with Cloud Build before deciding if you need a more sophisticated setup.
Following along with the example repo, setting up continuous integration requires a few files and folders in your project hierarchy.
Scripts: This folder contains Bash scripts used by Travis to execute the builds. Folder can be named whatever you want.
install.sh: Deals with installing Unity onto the Travis image.build.sh: Deals with running unit tests and then creating builds if the tests pass.post_build.sh: Deals with uploading the builds onto a UNIX server.upload.enc: An encrypted keyfile for authenticating onto the aforementioned server.UnityProject: The actual Unity project folder (i.e. the one that'll have Assets and Library as subfolders). It's recommended to keep the Unity project as a subfolder in the repo so it's separated from the build stuff (as well as other non-Unity files you want to share). Folder can be named whatever you want..travis.yml: Contains configuration for Travis.If you haven't created the Unity project yet, start with that. The example repo has a simple game for demo purposes. Note how UnityProject/.gitignore prevents plenty of local Unity stuff (e.g. Temp, Library) from being versioned (see our Unity and GitHub post for more info on the subject).
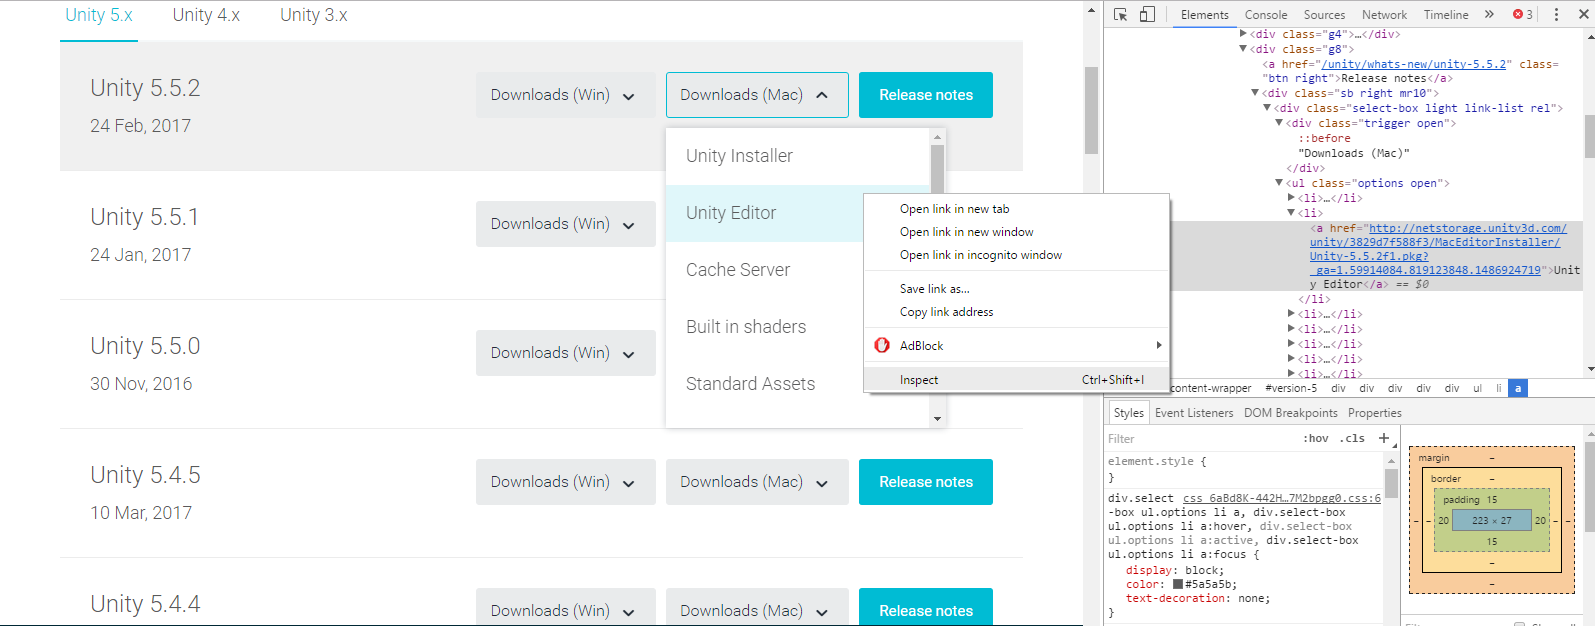
We will start with the install and build scripts. Our goal for installation is to download the Unity installers onto the image and then execute them. Our Travis image will be OSX (since the Unity editor cannot be run on Linux), so to find the download links go to the Unity download archive and locate which version of the editor your project uses. For that version, locate the Mac Unity Editor URL, a .pkg file (note that it isn't the Unity Installer download, which is a .dmg file for GUI setup). If it isn't clear what that URL is, start and cancel a download on your machine, and then in your browser's downloads window, the link should be shown there. You can also inspect the HTML element since it's just a hyperlink.
Finding the Unity download link
An alternate way to locate the links is to use this site which collects the links, though it may not have the most up-to-date versions. There will be several different links per version, but you just need the top link for Unity Editor.
Starting in Unity 5, build support for different platforms is split across different installer modules. What this means is that the Unity Editor link you just found will only allow the Travis image to make builds for Mac OSX. If you want to make builds for Windows, Linux, WebGL, or other platforms, then you need to also download and install other .pkg files. Those URLs can be derived from the form of those on this site. Even if that site doesn't have the version you need, the .pkg files will be available at URLs with the appropriate hash value (the hex string part of the URL) and version number.
First, adapt install.sh to fit your needs -- the linked version downloads and installs Unity version 5.5.1, as well as build support for Windows. Replace the URLs in that script with the ones you have found.
Next, adapt build.sh, whose duty is to run unit tests and then make builds. For unit testing, we will be using Unity editor tests, which are a relatively recent addition to Unity. How the actual tests are written is described here. Our build script executes these tests in "headless mode", and then proceeds to create builds for multiple targets. See the documentation on command line scripting to fit the script to your needs.
You could stop at this point, knowing if the build succeeded or failed. However, if you need to distribute your built project (for example, suppose you have team members who need to run the project but do not have the Unity editor installed), then you need to upload it from Travis to some other location. If you have an AWS account, then Travis can upload your build to an S3. This example will assume we have a Linux server available to us.
First, if you have an admin account on a Linux server, it's probably best to create a non-admin account which will be used for receiving the builds. Then from that account, generate an SSH keypair with ssh-keygen. Ensure that the public key is entered into the .ssh/authorized_keys file. Transfer the private key to your local machine (e.g. using scp). From there, encrypt the file with openssl (this program was in Git Shell; you can do some searching to find it. Alternately you can try using the travis encrypt-file command with the Travis gem described below, but as of now it has issues on Windows). The line would look like:
openssl aes-256-cbc -k "secret_password" -in keyfile -out keyfile.encWhere the "secret_password" would be something you come up with, keyfile is the path to the cleartext private SSH key file, and keyfile.enc is the path to the encrypted version. Make sure that keyfile never gets versioned; only keyfile.enc should enter your repository.
Now, adapt post_build.sh to fit your needs -- our version will chmod certain files so the build is runnable after we download it, tar and zip the files together, and then upload the tarball via scp. It is important not to leak any sensitive info like server name, account name, upload path, and authentication information in the Travis build logs (hence > dev/null 2>&1 at the end of the scp line).
We tie this all together with the .travis.yml, which will utilize everything else we've written. You may adapt this Travis configuration, though you will need to replace the environment variables (which are specific to our example project). All the variables used are listed below.
UNITYCI_PROJECT_NAME: the path to the Unity project (i.e. the folder containing Assets and Library), relative to the repo root.UPLOAD_KEYPATH: the path to the decrypted SSH key file, relative to the repo root. Note that this file does not exist in the repo, but the path is used in the before_install step to generate the file. The encrypted key file is assumed to have the same pathname with an extra .enc extension.UPLOAD_USER: the user name of the account used for scp.UPLOAD_HOST: the host name of the server used for scp.UPLOAD_PATH: the path on the server where the builds will be stored. Note that if this path leads to a public HTML directory, then that link can then be shared with a team to distribute the builds.KEYFILE_PASS: the password used to encrypt the SSH key file.Of these variables, the first two can be stored as cleartext in the YAML, since they are not sensitive. The remaining variables, though, are sensitive and should not be visible to the public. We can encrypt either by using the Travis CI web interface, or by using the travis gem on the command line. To do the latter, install Ruby (Ruby Installer or RVM) and then run gem install travis. Then, use a line like the one below for each of the environment variables, and .travis.yml will get updated with environment variables starting with - secure.
travis encrypt UPLOAD_USER=build_account --addWith the .travis.yml complete, go to the Travis CI web interface and flip the switch for your repo to turn builds on. Then, sit back and relax with the knowledge that automation has made your project uber awesome. ^_^